Connect X (Twitter) to aiga_ — Step-by-Step
Last updated 8 months ago
Before you start: You can use a free X Developer account, but strict rate limits apply. With free access you’ll only be able to post a game event with a poll about once every 6 hours. For more frequent posting, upgrade to a paid X Developer plan.
X Premium Subscription Required
To use this integration, your X account must have an active X Premium subscription. This feature does not work with Basic or Free X accounts due to API limitations.
Go to the X Developer Portal - Login or sign-up for an account
Visit: https://developer.x.comOpen (or create) your app
In the Developer Portal, select the app that was created when you signed up. If you don’t have one yet, create a new app.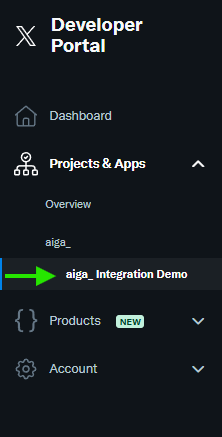
Open User Authentication settings
On your app page, go to Settings and click “Set Up” under User authentication settings.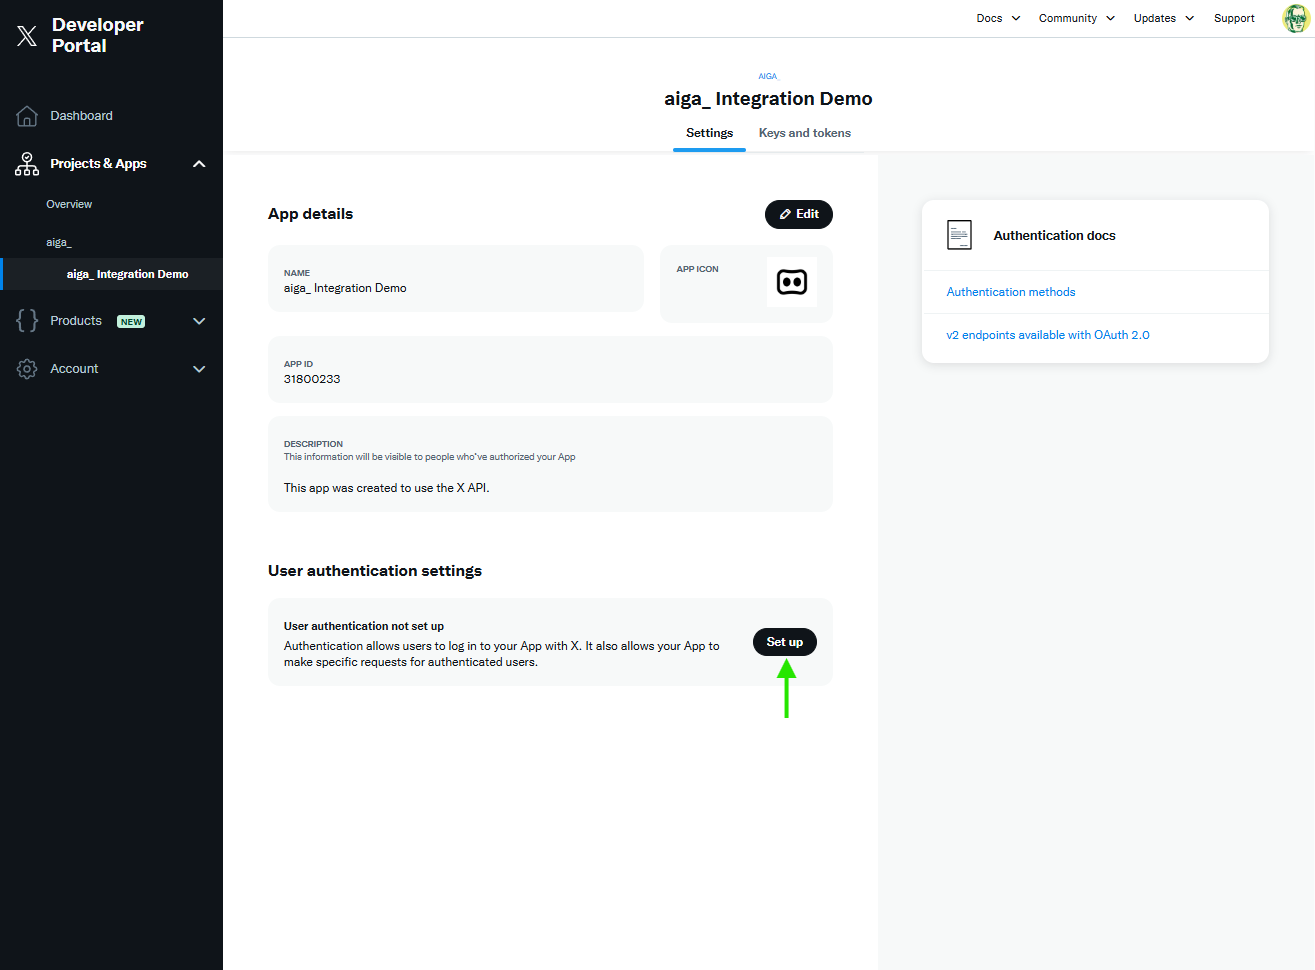
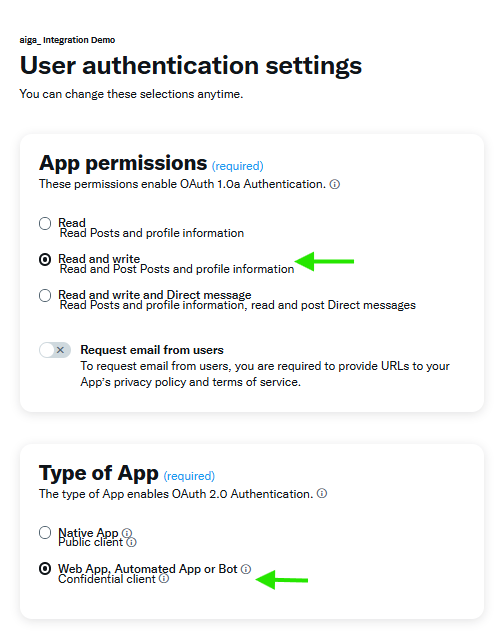
Choose permissions and app type
App permissions: select Read and Write
Type of App: select Webapp, Automated App or Bot
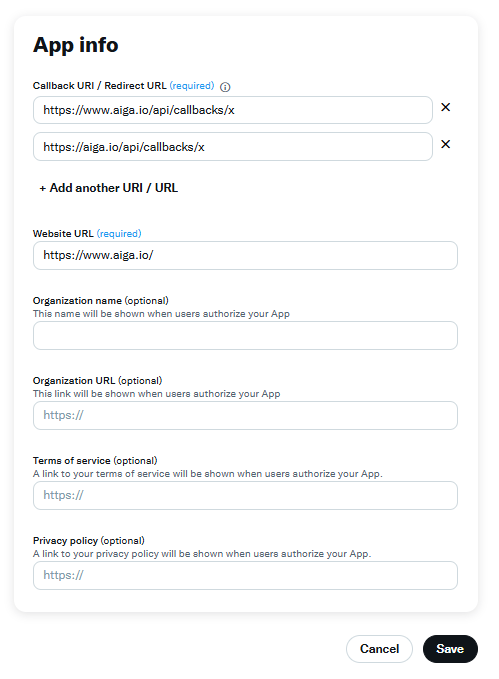
Add callback and website URLs
In App info, add both callback URLs (include both www and non-www):
https://www.aiga.io/api/callbacks/xhttps://aiga.io/api/callbacks/x
Then set Website URL to:
https://www.aiga.io/
Click Save.
Confirm your changes
Click Yes to confirm.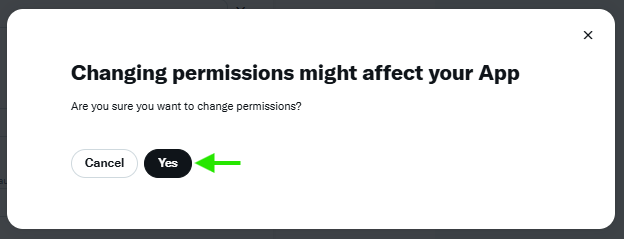
Copy your credentials
You’ll see your Client ID and Client Secret. Copy them and store them securely — you’ll need them in aiga’s X connection setup.
Tip: Treat your Client Secret like a password. Don’t share it publicly.
Open aiga’s X connections page
Go tohttps://www.aiga.io/connections/x. Scroll to Active Connections and click “+ Add Connection_”.
Create a new X connection
In New X Connection:
Enter any Name you like (for your reference)
Paste your Client ID and Client Secret
Click Save & Get Authorization Link.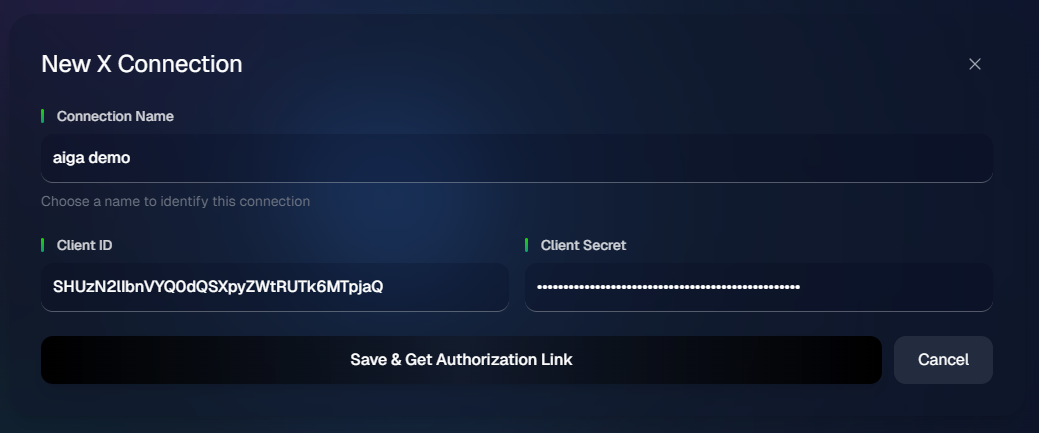
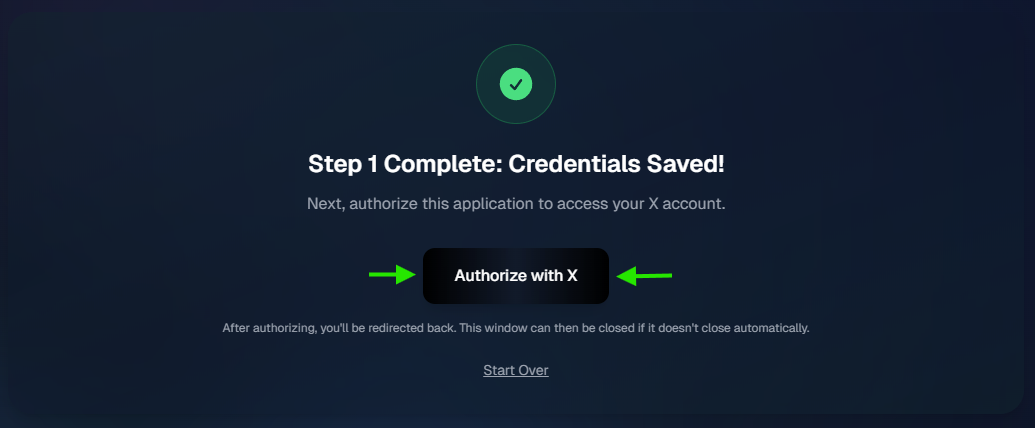
Start authorization
Click Authorize with X.You must do this step without leaving this page as refreshing the page will remove the authorization step and will you have to remove the Pending connection and create a new one.
Approve the app on X
In the X window/app, grant permissions to authorize the connection.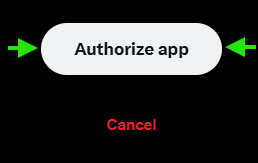
You’re connected
Your X connection is now active. You can start a new game in aiga and choose X as the platform.